Below are the steps to add a custom domain to Teespring.
Step 1: Choose your domain name and register
Step 2: Add your custom domain to your Teespring store
Step 3: Change DNS And Verify the connection
Let’s look at each step in detail.
Step 1: Choose your domain name and register
First you need a domain name that resonates your brand and the products that your selling on Teespring.
I recommend you to purchase your domain from Namecheap as they provide “whoisgaurd” protection for free.
Start by searching up your domain name on the search box and check for availability.

You can also use the “Beast Mode” to search multiple word combinations and arrive at a domain name that you like.

Once you have found a domain that is available, then proceed to the checkout page. (Use Promo code: MAY4DOMAIN)

On the checkout page make sure to keep your domain Privacy Enabled as it is Free forever and protects your identity.
Click confirm the order and proceed to create your name cheap account. Provide correct information while creating your account as that will be associated with the domain that you purchase.
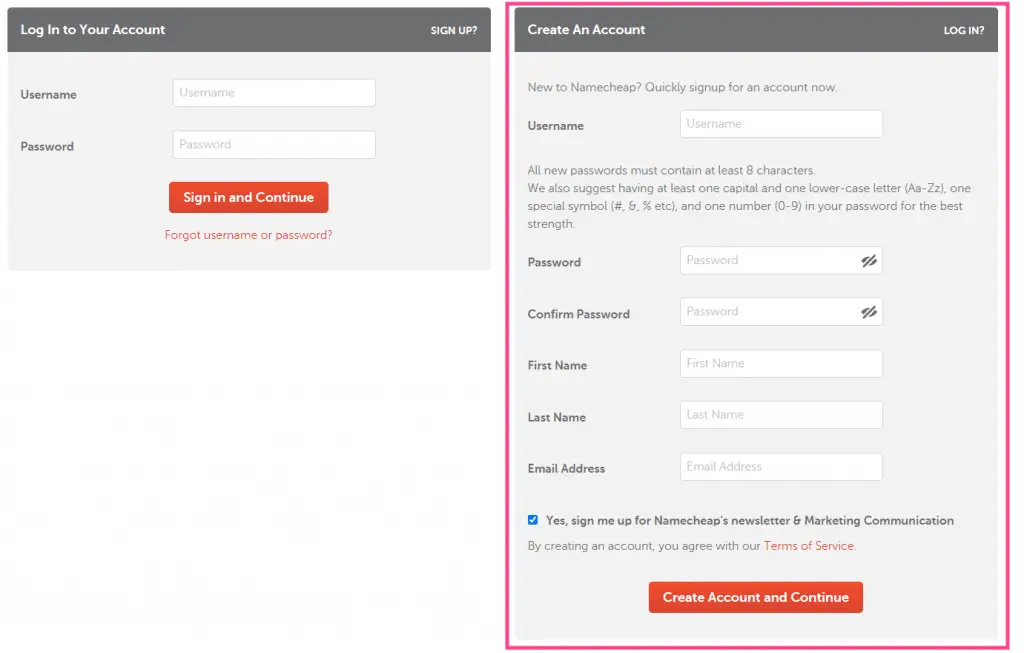
Once you have created your account, complete the purchase and move to the next step mentioned below.
Step 2: Add your custom domain to your Teespring store
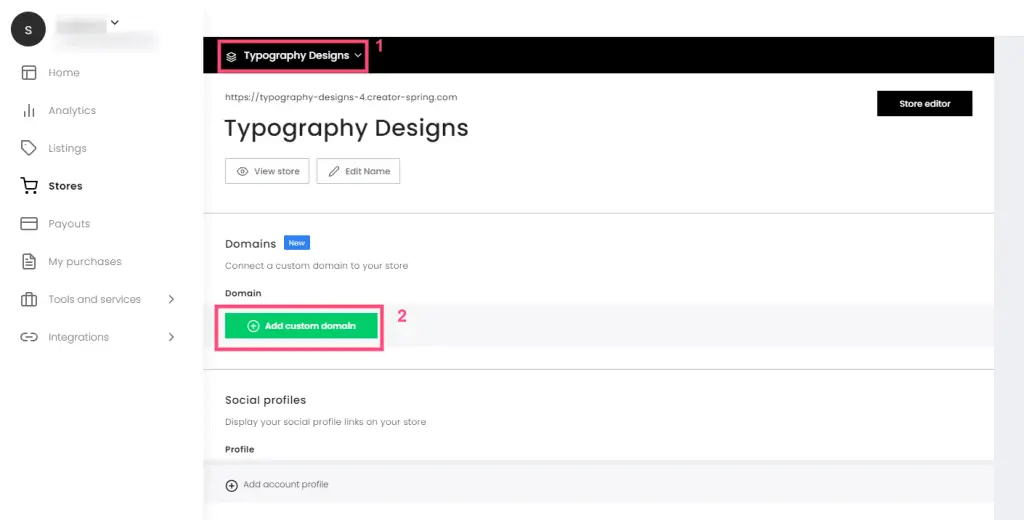
Login to your Teespring store and navigate to the store front section available on your dashboard.
Then, select the store from the list of stores that you have and then click add custom domain.
The “Add custom domain” feature in Teespring allows you to use your own domain with Teespring and that is how you can change the default URL of your Teespring store.
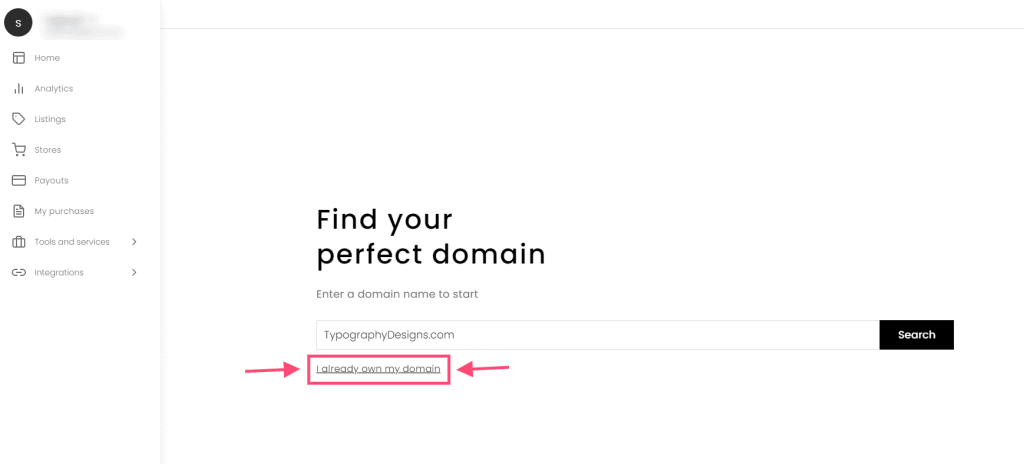
On the next page, choose the option, I already own a domain since you have purchased a domain on Namecheap and all you have to do now is connect it to Teespring.
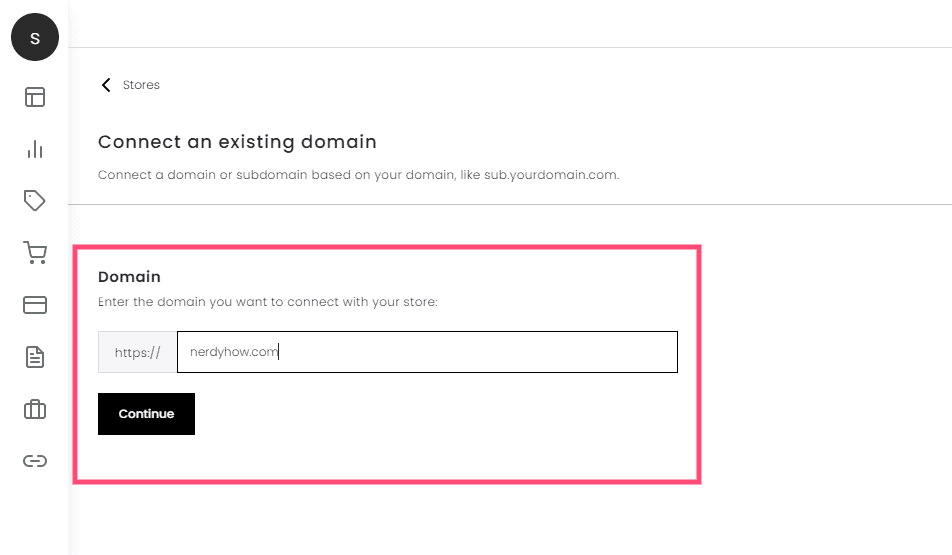
Now, go ahead and paste the domain name that you purchased on Namecheap and click continue.
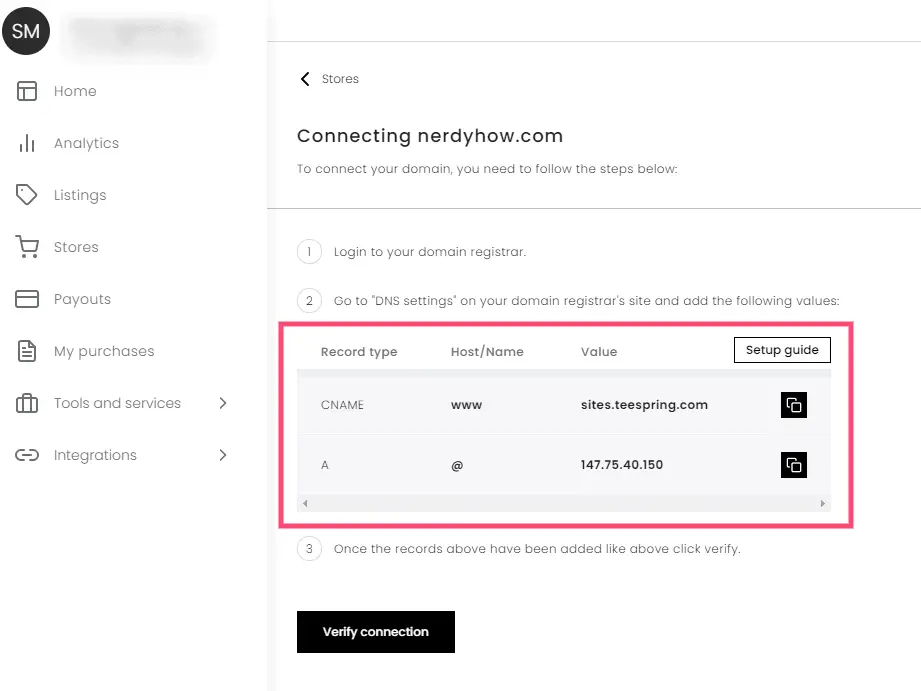
After you have clicked continue, finally you will have to add a few records provided by Teespring to your domain in Namecheap which we will see in the next step.
Step 3: Change DNS And Verify the connection
After you click Continue in the above step, in the next screen you will find the DNS record details as shown below.
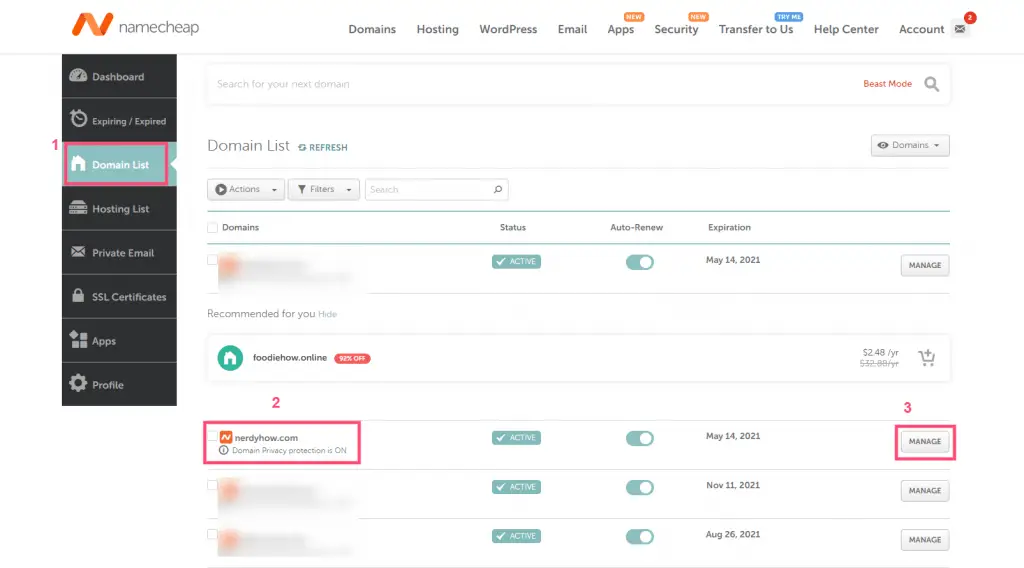
Keep the window of this screen open and now go back to your Namecheap account and navigate to the domain list and click the “Manage” option available to the right of your domain name.
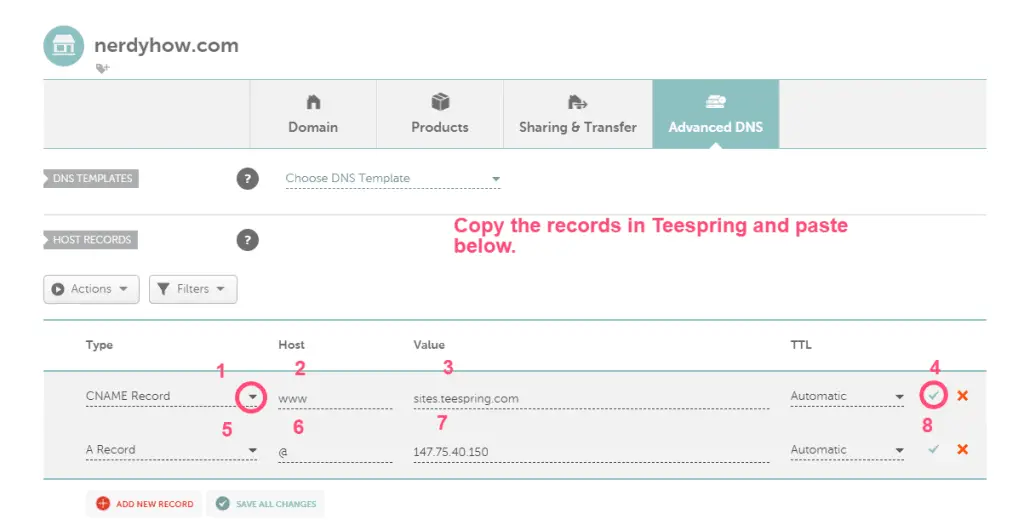
In the next window, click the “Advanced DNS” option.

In the Advanced DNS section, go ahead and delete all the existing records.
Don’t worry those are some default records provided by name cheap which basically shows a parking page instead of a blank page.
It’s of no use to you, so just delete all of those records.

Once you have deleted those records, the next step is to add the two records provided by Teespring.
Click the “Add New Record” button and select “CNAME Record” from the Type drop-down then copy and paste the details on your Teespring account as shown in the below image.
Similarly add “A Record” provided by Teespring and click “SAVE ALL CHANGES” button.
You have successfully completed the DNS settings and now it’s time to verify the connection between your domain and your store.
Go back to your Teespring tab and click Verify connection.
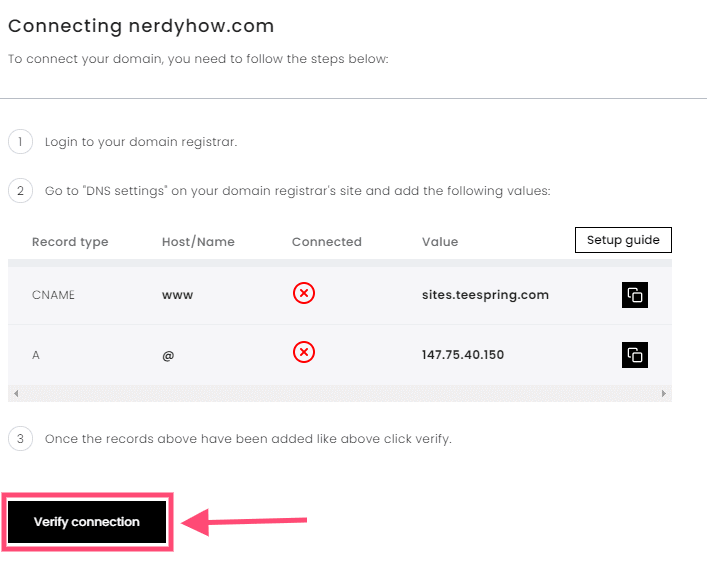
It can take up to 48 hrs. for your store to establish a connection with your domain. However, post that you are all set and you can view your store by just typing in your domain name.
That’s how you add a custom domain to your Teespring store.
Related articles: